Learning area: Art
Time commitment: Moderate (30 minutes)
Best for: Any classroom

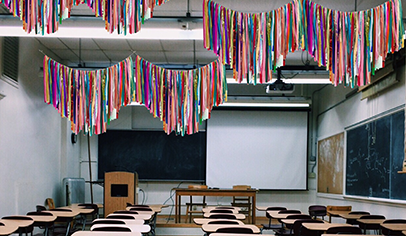
Welcome students back to school with colorful ceiling and wall art! Make your own ribbon garland with these simple steps.
Creating a welcoming environment can help motivate students and get them started on the right foot.
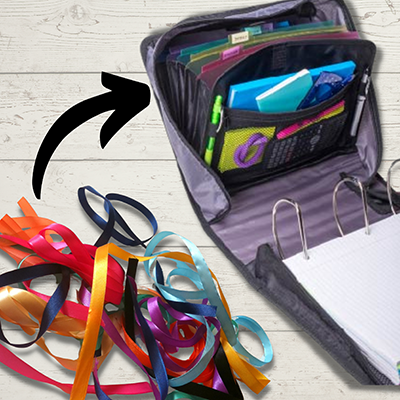
You can have your students help you create your garland, or you can do it on your own. Regardless, Case•it offers a unique and mobile way to store the supplies, so you can reuse the garland if you take it down. Or, storing these supplies means you can create colorful fun anywhere you go!
Pro tip: Keep the classroom inviting all year long by creating ribbons for different seasons to hang on the ceiling or above the windows. In addition to the ribbons, students can create seasonal crafts to hang from the ribbon! Your ribbon, along with extra supplies in case any of the ribbon needs fixed, can be stored in a Case•it binder—ingenious!
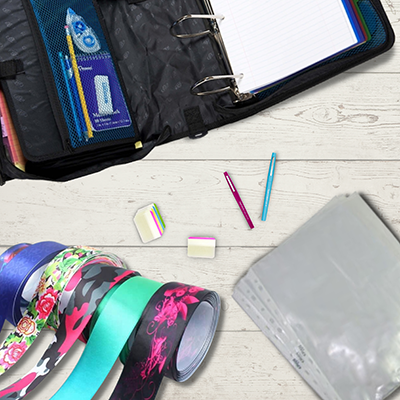
Materials:
- Case•it King Tab Zipper Binder in preferred color
- Case•it Tri-Zip Pencil Case in preferred color
- Sheet Protectors/or 3-ring zip pockets
- Divider Stickers
- Colorful ribbon/streamers (or plastic table clothes!)
- String
- Scissors
- Thumbtacks, tape, or Command Strips
- Ruler
Instructions:
Determine what style you’re going for–then go for it!
- Cut your ribbon into strips– either in symmetrical lengths for a fringy look, or different lengths for an eclectic look. We recommend mixing colors, too!
- Cut a long piece of string to carry all the ribbon– be sure to measure if you want to cover a certain amount of space!
- Start tying your ribbon to the string with a bowknot, or any knot style you like.
- Continue knotting ribbons until you’ve covered the length of the string.
- Hang string on the ceiling using thumbtack, Command Strips, or tape, depending on what your school allows.
Organize and store materials for later
- Take Case•it Mighty Zip Tab and put the Tri-Zip Pencil Pouch inside, along with sheet protectors on 3-inch rings.
- Store all scissors, tape, and string inside Case•it Tri-Zip Pencil Pouch.
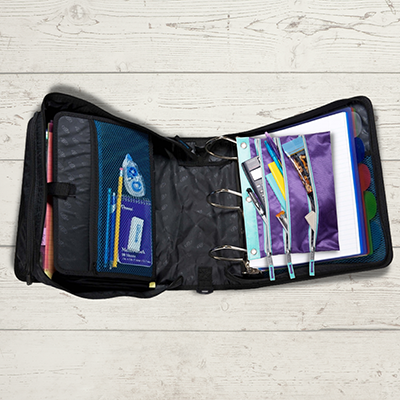
- Use Divider Stickers to label sheet protectors so you can stay organized.
- Use the attached file folder to organize more ribbon, so you can switch up the colors in your classroom whenever you want!