
Learning Area: Art, Visual Arts
Time: 40 minutes
Grades: Grades 6-10
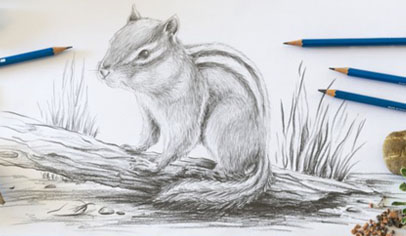
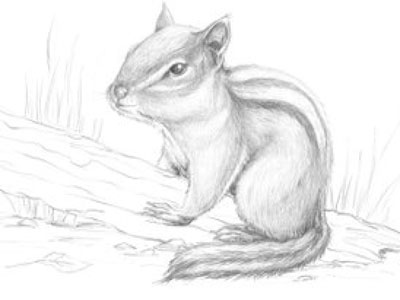
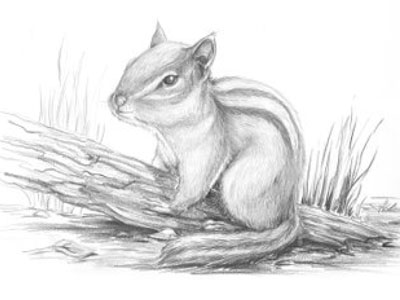
Chipmunks are playful, intelligent animals with beautiful striped coats that make them a perfect drawing subject. With this activity, you will learn how to sketch and shade a realistic chipmunk using graphite pencils in various degrees. You’ll practice layering, crosshatching, and adding depth to create fur texture and contrast.
Materials:
- STAEDTLER® Mars Lumograph pencils – assortment of hard and soft degrees
- STAEDTLER® Mars plastic eraser
- STAEDTLER® metal pencil sharpener
- Drawing paper
Instructions:
Step 1
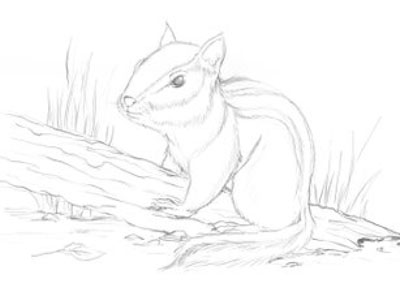
First, gently sketch your chipmunk with a 2H degree of hardness pencil. Do not add too many details. This should be an outline and general shapes.
Step 2
Using a softer pencil (hardness grade B), gradually work the head out with dashed crosshatching. Always keep the direction of the light in mind and shade accordingly from shadow to light.
Step 3
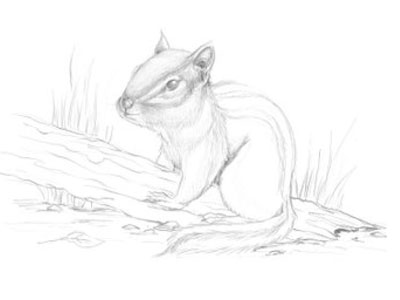
Using a 2B grade pencil, work out the darker areas of the chipmunk’s fur, i.e., the stripes on the back and tail, and the shadows, so that the pattern gradually gains depth.
Step 4
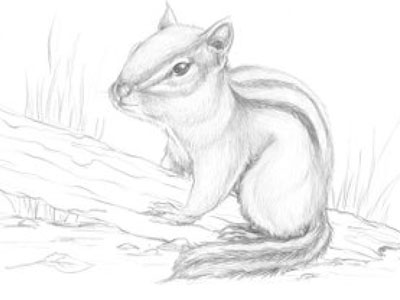
With hardness grade 4B, you now deepen the dark areas of your drawing, such as eyes or the shadow on the belly and feet. You can now work out the landscape around it and the wood structure of the tree trunk a bit further.
Step 5
Finally, use the softest pencil (hardness 6B) to create the landscape, soil structure, tree bark, and all deep shadows.
Pro tip: A piece of paper placed under your drawing hand will protect the areas that have already been worked out from smearing while you finish the rest of the drawing. Good luck and have fun!