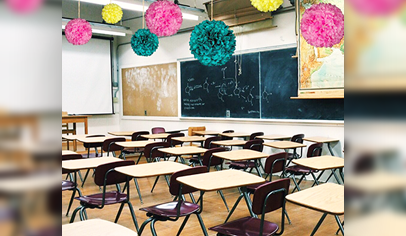

Welcome students back to school with colorful and fun ceiling art. Make your own tissue paper pom-poms with these simple steps. A warm and welcoming environment could help motivate students and create a better learning environment. As you may want to change colors every so often during the year Case•it offers a unique and mobile way to store the supplies. Please learn how to make these tissue paper pom-poms, and store these supplies so you can create colorful fun anywhere you go. You can even string them on a garland or dangle a cluster from the ceiling.
Materials:
Case•it King Tab Zipper Binder in preferred color
Case•it Tri-Zip Pencil Case in preferred color
Sheet Protectors/or 3-ring zip pockets
Divider Stickers
Colorful tissue paper
String
Wire
Scissors
Wire Cutters
Thumbtack or Tape
Glue
Ruler
Instructions:
A. Determine what colors, sizes, and amounts of each color you would like to make.
- Stack and Fold Tissue Paper
To make a single pom-pom, you’ll need about 8-12 sheets of tissue paper. You can use tissue paper in one color, or mix and match for a unique multicolor look. Stack the sheets, then accordion-fold the full stack into about 2-inch pleats. Be careful not to rip the tissue paper. Press down to crease the folds.
- Trim Edges of Tissue Paper
- Get creative for this step. For a scalloped edge, you can use scissors to round both ends of the tissue paper stack. If you’d like more of a spiky look, cut triangle points at the end of the tissue paper.
- If you prefer a small pom-pom, trim the ends of the tissue paper until they mimic the size you desire
- Attach Wire to Center
Take a long piece of wire and create a loop around the middle of the tissue paper stack. Twist the ends of the wires to secure the pieces of paper. Use a thin crafts wire for this step; thick wire may be too heavy and tear the paper. With the excess wire, fashion a hanging loop.
- Open the Pom-Pom
Lastly, fan out the paper to create a full and fluffy tissue paper pom-pom. Start by very gently pulling on each sheet to form the thick sphere shape. Ruffle and reposition the sheets carefully until you get an arrangement you like. To hang the pompom, attach a string or ribbon to the wire loop. To create a garland, string multiple pompoms onto a long piece of string or wire for the perfect classroom decor.
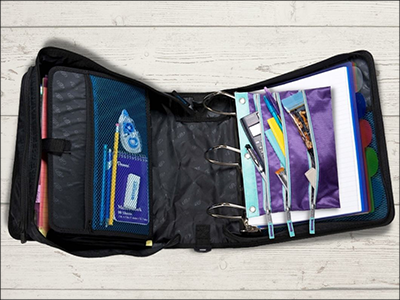
B. How to Organize and store the Materials
-
- Take Caseit Mighty Zip Tab and put Tri-Zip Pencil Pouch inside, along with Sheet protectors on 3-inch rings
- Store all pencils, scissors, tape, and string inside Caseit Tri Zip Pencil Pouch
-
- Use Divider Stickers to label sheet protectors with what color tissue paper is and store in order of how you plan to use it.
-
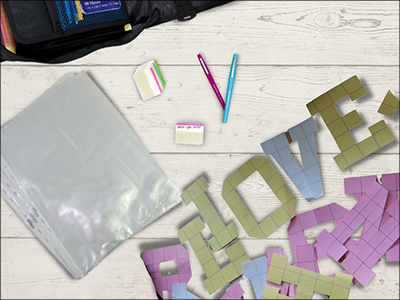
- Another way to divide it is to put each letter upper case or lower case on the divider stickers and sort it by alphabet and upper case or lower case, include punctuation, as necessary (this is if you cut out each letter individually)
- You can use the attached File folder to organize the tissue paper paper to store until you need to create more pom-poms
